
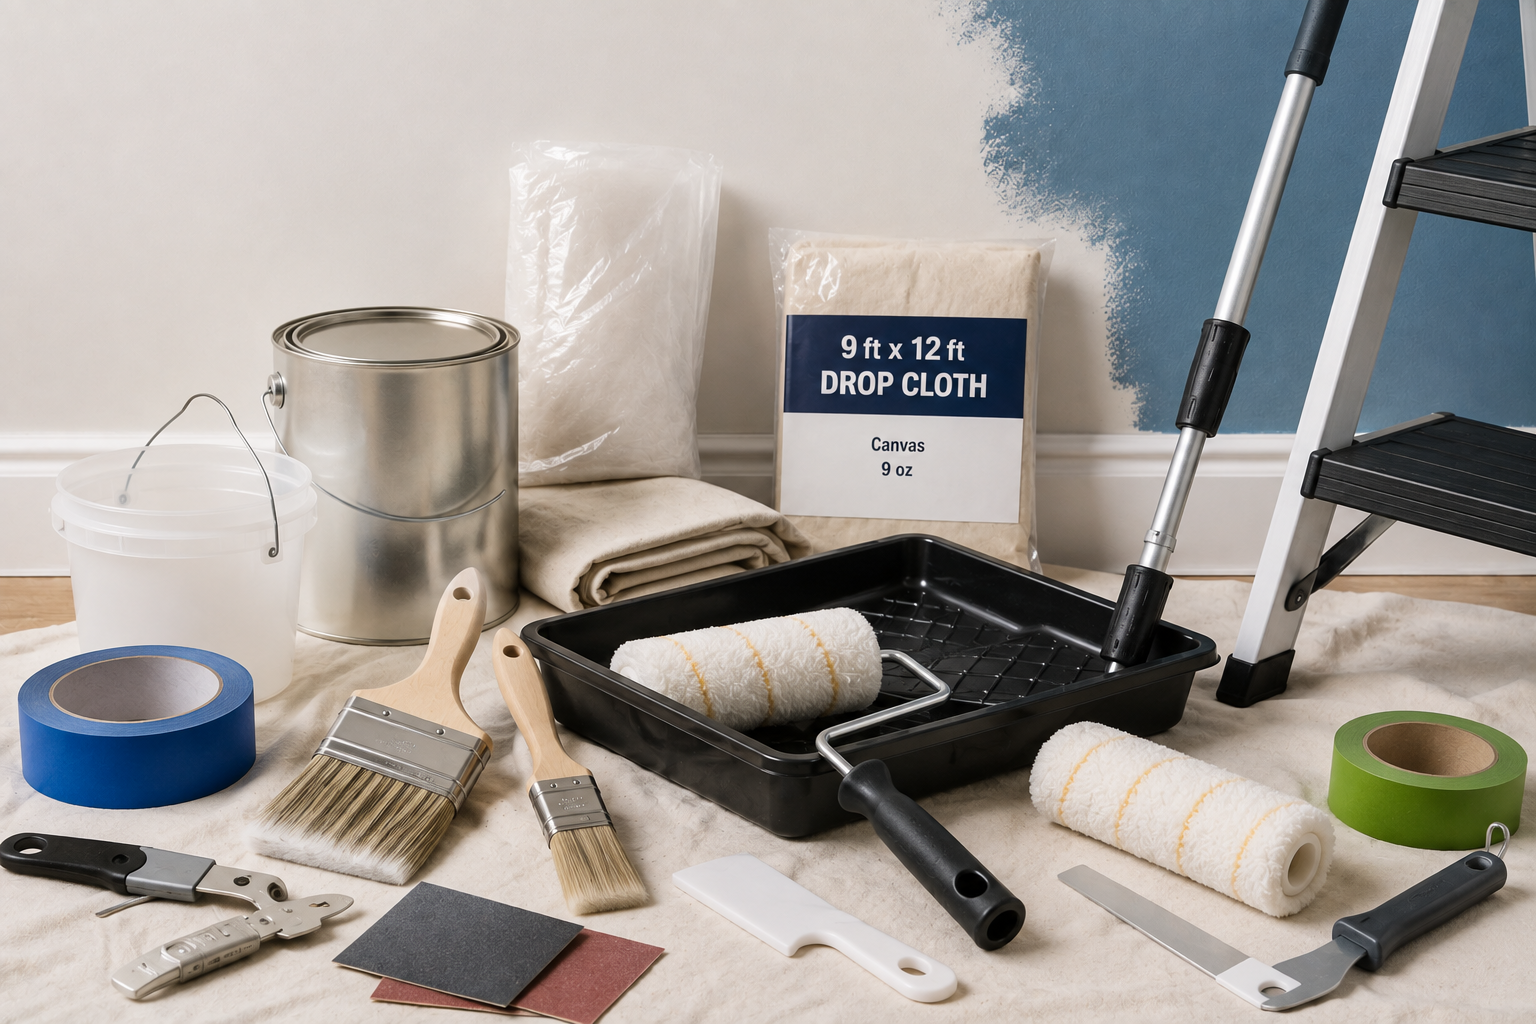
A great paint job depends on more than just choosing the right color, it depends on having the right painting tools for DIYers on hand before you ever open the can. Cutting corners on brushes, rollers, or prep supplies is one of the most common reasons a DIY paint job ends up looking uneven, streaky, or unfinished around the edges.
This guide covers every essential tool and supply, from brushes and rollers to prep, protection, and cleanup gear, along with practical buying advice so you can approach your next painting project fully equipped and genuinely confident in the result.
Painting Tools Every DIYer Needs
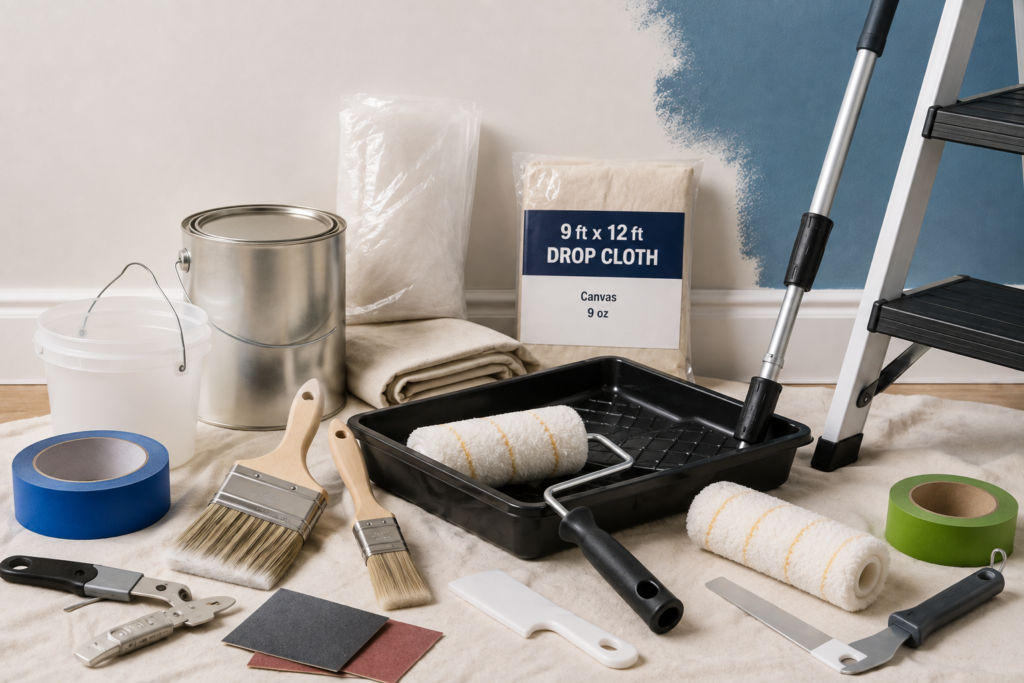
At minimum, every DIY painter needs a quality angled brush for cutting in edges, a roller with an appropriately sized nap for your wall texture, a roller tray, painter’s tape, drop cloths, and basic prep supplies like sandpaper and spackle for minor wall repairs. Beyond these essentials, an extension pole and a five-in-one painting tool make larger or more involved projects considerably easier and more efficient.
Essential Brushes
- Angled Sash Brush
An angled sash brush, typically 2 to 2.5 inches wide, is the essential tool for “cutting in”, painting clean, precise lines along ceilings, trim, corners, and edges where a roller can’t reach effectively. The angled bristle design allows for better control and precision in these tight areas compared to a straight-edge brush.
- Trim Brush
A smaller, straight-edge brush suits detailed trim work, doors, and window casings, offering more precision than a larger sash brush for these smaller, more detailed surfaces.
- Natural vs Synthetic Bristles
Natural bristle brushes work best with oil-based paints, since they can absorb water and become limp when used with latex paint. Synthetic bristle brushes (nylon, polyester, or a blend) work well with both latex and oil-based paints, making them the more versatile, practical choice for most homeowners using standard latex paint for the majority of their projects.
Essential Rollers
- Roller Frame and Covers
A standard roller frame paired with replaceable roller covers is the most efficient way to cover large, flat wall and ceiling areas quickly and evenly. Roller covers are consumable and generally replaced between different paint colors or after significant wear.
- Choosing the Right Nap Length
Roller nap (the thickness of the roller cover’s fabric) should match your wall’s texture. Short nap (1/4 to 3/8 inch) suits smooth walls and doors, providing a fine, even finish. Medium nap (3/8 to 1/2 inch) works well for most standard walls with light to moderate texture. Long nap (3/4 inch or more) is needed for heavily textured surfaces, stucco, popcorn ceilings, or rough masonry, allowing the roller to reach into deeper texture variations.
- Best Paint Roller for Walls
For most standard interior walls with light to moderate texture, a 3/8-inch nap roller cover offers the best all-around balance of coverage and finish smoothness, making it the most commonly recommended default choice for general wall painting.
Roller Nap Guide
| Surface Type | Recommended Nap Length |
| Smooth walls, doors, trim | 1/4 to 3/8 inch |
| Standard drywall, light texture | 3/8 to 1/2 inch |
| Textured walls, stucco | 3/4 inch or more |
| Popcorn or heavily textured ceilings | 3/4 to 1 inch |
Roller Trays and Liners
- Standard Roller Trays
A roller tray holds your paint supply and includes a ridged section for evenly loading your roller cover, essential for consistent paint application without over-saturating the roller.
- Disposable Tray Liners
Disposable plastic liners fit inside standard roller trays, making cleanup considerably faster, since you simply remove and discard the liner rather than washing paint residue out of the tray itself between colors or at project completion.
Extension Poles
- Why They’re Worth Having
An extension pole attaches to your roller frame, letting you paint ceilings and higher wall sections without needing a ladder for every section, while also improving leverage and reducing arm fatigue during larger wall painting sessions.
- Choosing the Right Length
Standard extension poles range from about 2 to 4 feet, suitable for most ceiling and upper-wall painting, with longer poles available for very high ceilings or exterior work on two-story homes.
Painter’s Tape for Clean Lines
- Why Quality Tape Matters
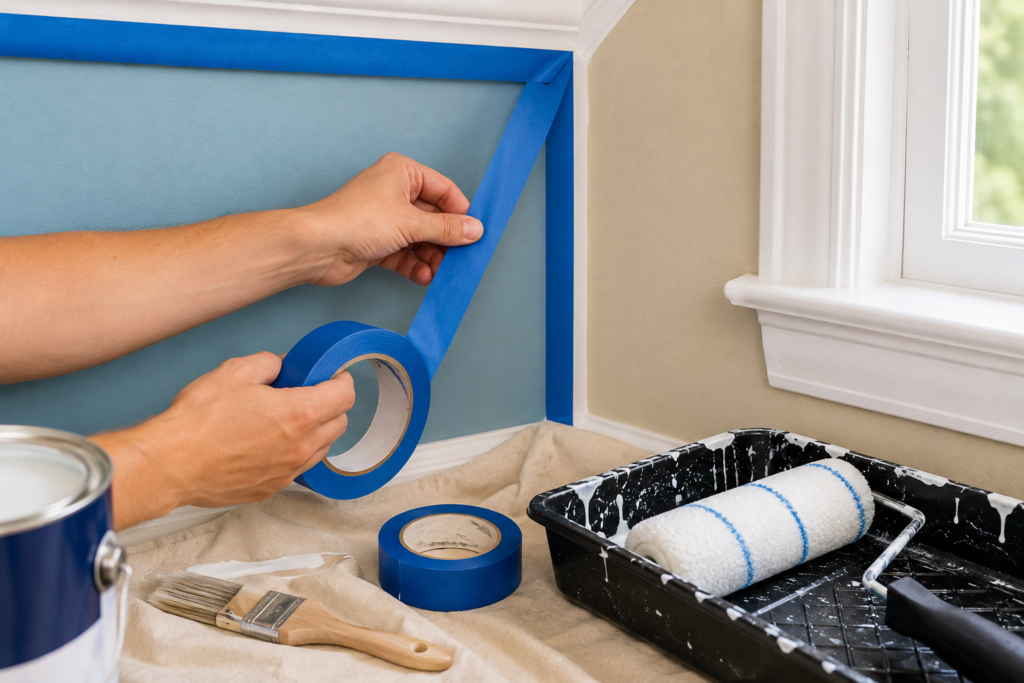
Painter’s tape protects trim, ceilings, and adjacent surfaces from paint bleed, creating clean, defined lines between different colors or surfaces. Lower-quality tape can allow paint to seep underneath or leave residue when removed, undermining the crisp lines it’s meant to create.
- Choosing the Right Tape
Standard blue painter’s tape works well for most short-term applications, while specialty tapes (often green or yellow-labeled for extended wear or delicate surfaces) offer longer removal windows or reduced risk of pulling off existing paint on more fragile surfaces.
- Proper Tape Application
Press tape down firmly along its entire length to prevent paint seepage underneath, and consider running a thin bead of caulk or a plastic putty knife along the tape’s edge to seal it further for particularly clean results on detailed trim work.
- Timing for Tape Removal
Removing tape too late, after paint is fully dry and cured, can risk pulling up dried paint along with the tape. Most manufacturers recommend removing tape while paint is dry to the touch but not yet fully cured, generally within a specific window noted on the paint product itself.
Drop Cloths and Floor Protection
Canvas Drop Cloths
Reusable canvas drop cloths offer durable, absorbent floor and furniture protection, staying in place better than lighter materials and standing up to repeated use across multiple projects.
Plastic Drop Cloths
More affordable and disposable, plastic drop cloths work well for one-time or occasional use, though they can be slippery underfoot and are more prone to shifting out of place during a project compared to canvas.
Furniture and Fixture Covers
Beyond floor protection, plastic sheeting or old sheets over furniture, light fixtures, and any items that can’t be moved out of the room protect against paint splatter and drips during ceiling or high-wall work specifically.
Surface Preparation Tools
- Sandpaper
Various sandpaper grits help smooth rough patches, prepare glossy surfaces for better paint adhesion, and feather the edges of patched or repaired areas so they blend seamlessly with the surrounding wall.
- Spackle or Wall Filler
Essential for filling small holes, dents, or cracks before painting, ensuring a smooth, even surface rather than painting directly over visible imperfections that will only become more noticeable once coated.
- Putty Knife
Used for applying spackle or wall filler smoothly and evenly, along with scraping away loose or peeling paint before priming and repainting a damaged surface.
- Cleaning Supplies
A mild detergent solution and sponge or cloth help remove dust, grease, and grime from walls before painting, since paint applied over a dirty surface won’t adhere as well or look as smooth as it would on a properly cleaned surface.
The Five-in-One Painting Tool
This compact, multi-purpose tool combines several functions in one handheld device: scraping loose paint, opening paint cans, cleaning excess paint from roller covers, smoothing spackle, and even cleaning brush bristles. Its versatility makes it a genuinely practical addition to nearly any DIY painting toolkit.
Ladders and Step Stools
- Matching Ladder Height to Your Project
A basic step ladder handles most standard ceiling heights and upper wall sections in typical residential rooms, while taller extension ladders become necessary for vaulted ceilings, stairwells, or exterior painting projects on multi-story homes.
- Ladder Safety Basics
Always ensure your ladder is on stable, level ground, avoid overreaching to the side (repositioning the ladder instead), and never stand on the very top rung, basic precautions that matter just as much during a painting project as any other home task involving height.
Paint Mixing and Application Accessories
- Paint Stir Sticks
Essential for thoroughly mixing paint before and periodically during application, since pigment and additives can settle over time, particularly in cans that have sat for a while since purchase.
- Paint Strainer Bags or Mesh
Useful when reusing older paint that may have developed small clumps or dried bits, straining it before application helps avoid these imperfections showing up in your finished, smooth paint surface.
- Paint Can Opener
A simple, inexpensive tool specifically designed for opening paint cans cleanly, avoiding the bent, damaged lids that can result from using a flathead screwdriver improperly.
Complete Painting Tools Checklist
| Category | Essential Items |
| Brushes | Angled sash brush, trim brush |
| Rollers | Roller frame, appropriate nap covers, extension pole |
| Trays | Roller tray, disposable tray liners |
| Tape and protection | Painter’s tape, canvas or plastic drop cloths |
| Surface prep | Sandpaper, spackle, putty knife, cleaning supplies |
| Multi-purpose | Five-in-one painting tool |
| Access | Step ladder or extension ladder |
| Mixing/application | Stir sticks, paint strainer, can opener |
Cleanup Supplies
- For Latex (Water-Based) Paint
Warm soapy water is generally sufficient for cleaning brushes and rollers used with latex paint, making cleanup considerably simpler than oil-based alternatives.
- For Oil-Based Paint
Mineral spirits or a similar solvent is necessary for properly cleaning brushes and rollers after oil-based paint use, since soap and water alone won’t effectively remove the oil-based residue.
- Brush and Roller Storage
Properly cleaned brushes should be reshaped and stored flat or hanging to maintain their bristle shape, while roller covers, if not fully cleaned for reuse, can be wrapped tightly in plastic for short-term storage between painting sessions on the same project.
Choosing Quality Over Budget: Where It Matters Most
- Brushes and Rollers Are Worth Investing In
Higher-quality brushes and roller covers generally hold more paint, apply more evenly, and shed fewer bristles or fibers into your finished paint job compared to the cheapest available options, making this a genuinely worthwhile area to spend a bit more.
- Where Budget Options Are Reasonable
Drop cloths, mixing sticks, and other basic prep supplies can reasonably be purchased at a more budget-friendly price point without meaningfully compromising your project’s final results.
Practical Buying Tips
- Match roller nap to your specific wall texture rather than assuming one standard roller suits every surface
- Invest in quality brushes and roller covers, since this is where budget cutting most noticeably affects your finished result
- Buy painter’s tape specifically suited to your project’s timeline and surface delicacy
- Keep basic surface prep supplies (spackle, sandpaper, a putty knife) on hand even for projects that don’t seem to need major repairs, since minor touch-ups often come up once you start
- Consider an extension pole for any project involving ceilings or extensive wall coverage, given the time and fatigue savings it offers
Common Mistakes to Avoid
- Using the wrong roller nap for your wall texture, resulting in uneven coverage or a finish that doesn’t match the wall’s actual surface
- Skipping quality painter’s tape, leading to bleed-through and uneven, unprofessional-looking lines
- Removing tape too late, after paint has fully cured, risking pulled-up dried paint along with the tape
- Neglecting surface prep tools, painting directly over dust, grease, or minor damage that will show through the finished coat
- Using natural bristle brushes with latex paint, causing the bristles to absorb water and become limp and less effective
Conclusion
Having the right painting tools for DIYers on hand before you start makes the genuine difference between a paint job that looks professional and one that shows every shortcut taken along the way. Prioritize quality brushes and rollers matched to your specific project, don’t skip proper surface prep and painter’s tape, and round out your kit with the practical accessories, an extension pole, a five-in-one tool, that make larger projects considerably more manageable. With the right tools assembled ahead of time, you’ll spend less time fighting your equipment and more time achieving the clean, even results you’re actually aiming for.
Frequently Asked Questions
1- What roller nap should I use for standard interior walls?
A 3/8-inch nap roller cover generally offers the best all-around balance of coverage and finish smoothness for most standard drywall with light to moderate texture.
2- Do I need an extension pole for painting?
It’s not strictly required for every project, but it becomes genuinely valuable for ceilings and larger wall areas, improving leverage, reducing arm fatigue, and often eliminating the need for constant ladder repositioning.
3- What’s the best painter’s tape for clean lines?
Standard blue painter’s tape works well for most short-term applications, while specialty tapes designed for extended wear or delicate surfaces offer additional protection for more detailed or sensitive trim work.
4- Should I buy natural or synthetic paintbrushes?
Synthetic bristle brushes work well with both latex and oil-based paints, making them the more versatile, practical choice for most homeowners primarily using standard latex paint.
5- How do I clean paint brushes after using latex paint?
Warm, soapy water is generally sufficient for thoroughly cleaning brushes and rollers used with latex paint.
6- What is a five-in-one painting tool used for?
This multi-purpose tool combines several functions, scraping, can opening, roller cleaning, spackle application, and brush cleaning, into one compact, genuinely practical handheld device.
7- When should I remove painter’s tape after painting?
Most manufacturers recommend removing tape while the paint is dry to the touch but not yet fully cured, since waiting until paint is completely cured risks pulling up dried paint along with the tape.