Getting started with home improvement can feel intimidating, especially if you’ve never picked up a drill or don’t know a stud finder from a level. The good news is that plenty of genuinely useful DIY projects are approachable for complete beginners.
This guide covers beginner-friendly DIY projects, the basic tools you’ll need, and practical tips for building confidence as you take on more home improvement tasks. We’ll also cover home improvement projects, beginner DIY skills, and essential tool advice for American homeowners just getting started.
By the end, you’ll have a clear list of approachable projects to try, along with the knowledge to tackle them safely and successfully.
Where Should Beginners Start?
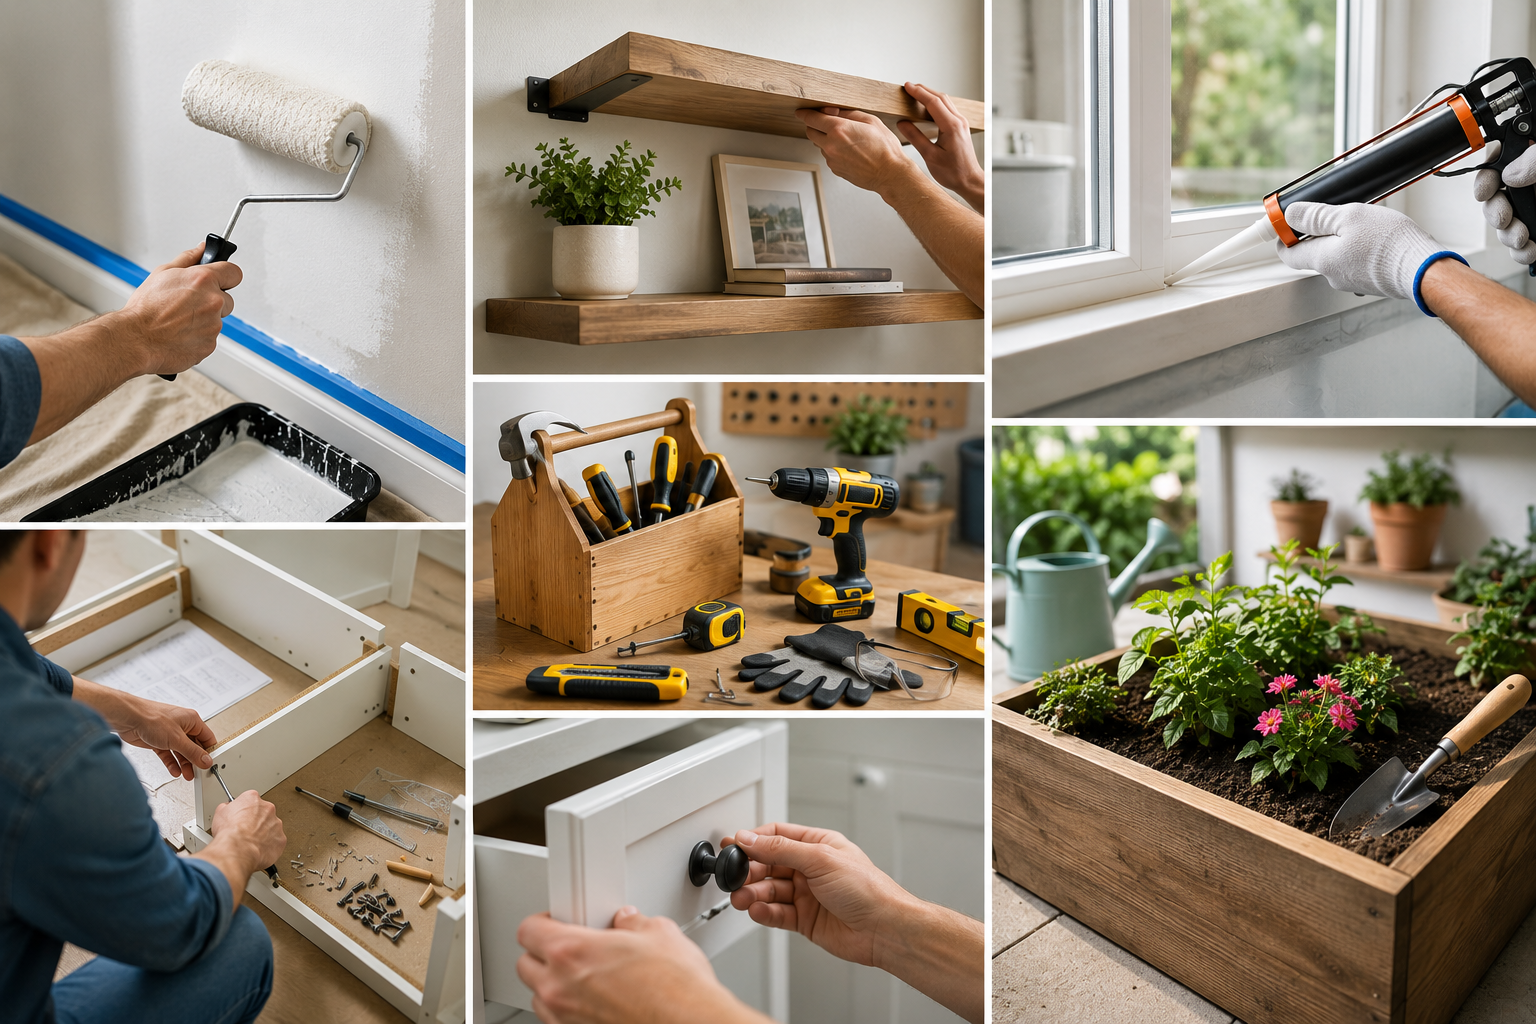
Start with low-risk, low-cost projects that don’t involve electrical wiring, gas lines, or structural changes, such as painting, basic shelving, caulking, and simple furniture assembly. These projects teach fundamental skills like measuring, using basic tools, and following instructions, building a foundation for more advanced projects down the road.
As you gain confidence and basic tool familiarity, you can gradually take on slightly more involved projects, always researching thoroughly and calling a professional for anything involving electrical, gas, or major structural work.
Essential Tools for Beginner DIY Projects
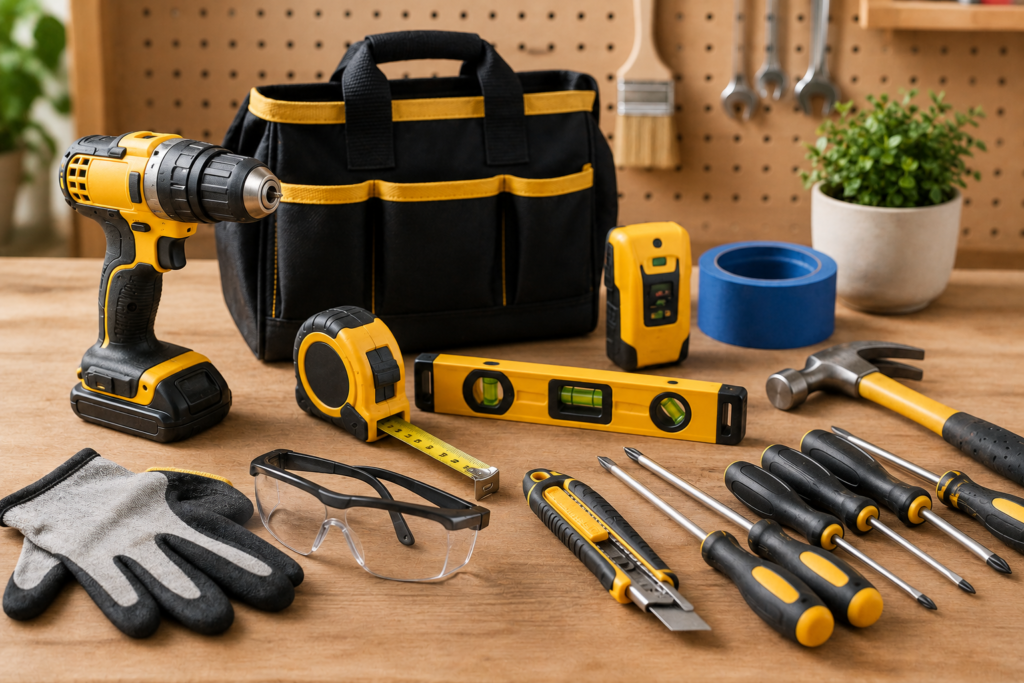
Before diving into specific projects, it helps to have a basic toolkit that covers most beginner-level home improvement tasks.
Basic beginner toolkit:
- A cordless drill with basic bits
- A tape measure
- A level
- A stud finder
- A utility knife
- A hammer
- A set of screwdrivers
- Painter’s tape
- Safety glasses and work gloves
This modest collection covers the vast majority of beginner projects without requiring a significant upfront investment. You can always add specialized tools later as specific projects call for them.
1- Painting a Room
Painting is one of the most popular and approachable beginner DIY projects, offering a significant visual impact for a relatively modest investment of time and money.
What You’ll Need
- Paint and primer, if needed for your wall condition
- Painter’s tape
- Drop cloths
- Rollers, brushes, and a paint tray
- Sandpaper for minor wall imperfections
Basic Steps
- Clear the room and cover floors and furniture with drop cloths
- Clean walls and lightly sand any rough patches
- Apply painter’s tape along trim, ceilings, and edges
- Apply primer if painting over a dark color or bare drywall
- Paint in sections, working from top to bottom
- Remove tape while the paint is still slightly wet to prevent peeling
Beginner tip: Start with a small room or a single accent wall to build confidence before tackling a larger space.
2- Installing Floating Shelves
Floating shelves add storage and style to any room, and installing them is a manageable project for beginners once you understand a few key principles.
What You’ll Need
- A stud finder
- A level
- A drill
- Appropriate wall anchors or screws, depending on wall type
- The shelf and mounting hardware, typically included
Basic Steps
- Use a stud finder to locate wall studs for secure mounting
- Mark and measure your desired shelf height and position
- Use a level to ensure the mounting bracket is straight
- Drill pilot holes and secure the bracket according to the manufacturer’s instructions
- Attach the shelf to the mounted bracket
Beginner tip: Mounting into studs provides significantly more support than relying solely on wall anchors, especially for shelves that will hold heavier items.
3- Caulking Windows and Bathrooms
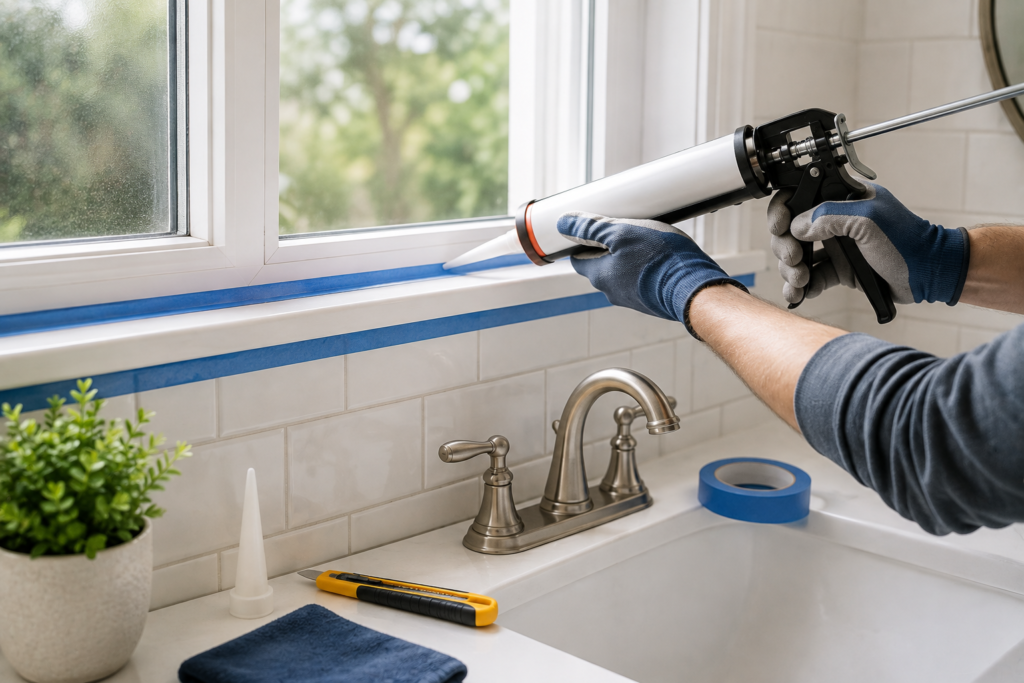
Caulking is a simple, low-cost project that improves both appearance and function, sealing gaps that can let in moisture, drafts, or pests.
What You’ll Need
- A caulking gun
- The appropriate caulk type for your project, such as silicone for bathrooms
- A caulk removal tool or utility knife
- Painter’s tape for clean lines
Basic Steps
- Remove old, cracked, or discolored caulk using a caulk removal tool or utility knife
- Clean and dry the area thoroughly before applying new caulk
- Apply painter’s tape along both edges of the gap for a clean line
- Apply a steady, even bead of caulk along the gap
- Smooth the caulk with a finger or caulking tool, then remove the tape before it dries
Beginner tip: Work in manageable sections rather than trying to caulk an entire room at once, since caulk can begin to skin over before you finish smoothing it.
4- Assembling Flat-Pack Furniture
While it might seem obvious, properly assembling flat-pack furniture is a genuine skill that builds familiarity with tools, instructions, and spatial reasoning.
What You’ll Need
- A screwdriver set or drill with appropriate bits
- The included hardware and instructions
- A clean, open workspace
Basic Steps
- Lay out all pieces and hardware, checking against the included parts list
- Read through the full instructions before starting assembly
- Assemble in the order specified, rather than skipping ahead
- Avoid fully tightening screws until the entire piece is assembled, which allows for minor adjustments
- Do a final tightening pass once the piece is fully assembled
Beginner tip: Take photos of each assembly stage as you go, which makes it easier to troubleshoot if something doesn’t look right later in the process.
5- Installing a Backsplash with Peel-and-Stick Tiles
Peel-and-stick backsplash tiles offer a beginner-friendly way to update a kitchen or bathroom without the complexity of traditional tile installation.
What You’ll Need
- Peel-and-stick tile sheets
- A utility knife or scissors
- A level
- A tape measure
- A smoothing tool or credit card for pressing tiles
Basic Steps
- Clean and dry the wall surface thoroughly before starting
- Measure and plan your layout, starting from a level, centered point
- Peel the backing and apply tiles, pressing firmly and smoothing out air bubbles
- Trim tiles as needed around outlets, switches, and corners
- Press edges firmly to ensure full adhesion
Beginner tip: Turn off power at the breaker before working around outlets or switches, even though you’re not doing electrical work directly, as a simple precaution.
6- Refreshing Cabinet Hardware
Swapping out dated cabinet knobs and pulls is one of the simplest, most affordable ways to refresh a kitchen or bathroom’s appearance.
What You’ll Need
- A screwdriver or drill
- New hardware
- A tape measure
- A template or jig, if changing hole spacing
Basic Steps
- Remove existing hardware and note existing screw hole placement
- If new hardware uses the same spacing, simply screw in the replacement
- If spacing differs, use a template or jig to mark and drill new holes accurately
- Fill old holes with wood filler if positions have changed
- Attach new hardware securely
Beginner tip: Buy one piece of hardware first to test fit and style before purchasing enough for your entire kitchen or bathroom.
7- Weatherstripping Doors and Windows
Weatherstripping is a practical, energy-saving project that’s simple enough for complete beginners while providing genuine, noticeable benefits.
What You’ll Need
- Weatherstripping material suited to your door or window type
- A utility knife or scissors
- A tape measure
- A cleaning cloth
Basic Steps
- Clean the door or window frame thoroughly before applying new material
- Measure the area needing weatherstripping
- Cut the weatherstripping to the appropriate length
- Apply according to the product’s specific instructions, typically peel-and-stick or nail-in styles
- Test the door or window to confirm a proper seal without excessive resistance
Beginner tip: Check weatherstripping periodically, since it can wear down faster in high-traffic entry points and may need replacement more often than expected.
Comparing Beginner Project Difficulty and Cost
| Project | Difficulty | Typical Time | Approximate Cost |
| Painting a room | Easy | A weekend | Low-moderate |
| Floating shelves | Easy | A few hours | Low |
| Caulking | Easy | A few hours | Low |
| Flat-pack furniture | Easy | Varies by piece | Varies |
| Peel-and-stick backsplash | Easy-Moderate | A weekend | Low-moderate |
| Cabinet hardware | Easy | A few hours | Low |
| Weatherstripping | Easy | A few hours | Low |
Safety Tips for Beginner DIYers
Even simple projects benefit from basic safety awareness, helping you avoid injury and costly mistakes.
- Always wear safety glasses when drilling, cutting, or sanding
- Turn off power at the breaker before working near outlets or switches, even for non-electrical tasks
- Read all instructions fully before starting, rather than figuring things out as you go
- Use the right tool for the job rather than improvising with whatever is closest at hand
- Know your limits: projects involving electrical wiring, gas lines, or structural changes should be handled by licensed professionals
When to Call a Professional Instead
Not every home improvement task is suitable for a beginner, and recognizing this early can prevent costly mistakes or safety hazards.
- Electrical work: Wiring, breaker panels, and anything beyond simple fixture swaps should be handled by a licensed electrician.
- Gas line work: Any project involving gas appliances or connections requires a licensed professional, given the serious safety risks involved.
- Structural changes: Removing or altering load-bearing walls requires professional assessment and often permits.
- Plumbing beyond basic fixture replacement: Simple faucet or showerhead swaps are generally beginner-friendly, but pipe work or major plumbing changes are best left to professionals.
How to Build Confidence for Bigger Projects
Starting small and gradually building skills is the most effective way to grow into more ambitious DIY projects over time.
- Master the basics first: Comfortable use of a drill, level, and stud finder forms the foundation for most future projects.
- Research thoroughly before starting: Watching tutorials and reading detailed instructions before beginning helps you understand the full process, not just the first few steps.
- Start with reversible projects: Painting and hardware swaps are easy to redo if you’re not happy with the result, making them lower-stakes ways to practice.
- Don’t rush: Taking your time, especially early on, helps you develop good habits and reduces the likelihood of mistakes.
- Learn from mistakes: Even experienced DIYers make errors. Treating early missteps as learning opportunities keeps the process encouraging rather than discouraging.
Building a Simple Project Plan Before You Start
Even a small beginner project benefits from a little upfront planning, and building this habit early makes future projects go far more smoothly.
- List the materials and tools you’ll need: Checking this against what you already own before heading to the store saves an extra trip and helps you budget accurately.
- Estimate a realistic timeframe: Beginners often underestimate how long a project will take, so building in extra time reduces frustration if something takes longer than expected.
- Prepare your workspace in advance: Clearing the area, laying down protective coverings, and gathering tools beforehand makes the actual project work far more efficient once you begin.
- Have a backup plan for mistakes: Knowing in advance how to fix common issues, such as a crooked shelf bracket or a paint drip, helps you stay calm and solve problems rather than feeling discouraged partway through.
A little planning goes a long way toward making beginner projects feel manageable, and this habit carries over well into more advanced projects.
Conclusion
Beginner DIY projects like painting, installing shelves, caulking, and swapping cabinet hardware offer an approachable way to build real home improvement skills without significant risk or cost. Starting with a basic toolkit and low-stakes projects helps you develop confidence, learn fundamental techniques, and gradually take on more involved tasks over time. As you grow more comfortable, remember to recognize your limits, calling in a licensed professional for anything involving electrical, gas, or structural work to keep your home improvement journey both successful and safe.
Frequently Asked Questions
1- What DIY project should a complete beginner start with?
Painting a small room or single wall is one of the most approachable starting projects, since it requires minimal tools and is relatively forgiving of minor mistakes.
2- What tools does every beginner DIYer need?
A cordless drill, tape measure, level, stud finder, screwdriver set, and basic safety gear cover the majority of beginner projects.
3- Is it safe for beginners to work near electrical outlets?
Simple tasks like installing a backsplash near outlets are generally fine with basic precautions, such as turning off power at the breaker, but actual electrical wiring work should be left to a licensed electrician.
4- How much does it typically cost to start doing DIY projects?
A basic beginner toolkit can be assembled affordably, and many starter projects like caulking or hardware swaps cost relatively little in materials.
5- Can beginners install their own shelving safely?
Yes, as long as shelves are properly mounted into wall studs or appropriate anchors are used for the shelf’s expected weight.
6- When should a beginner call a professional instead of attempting a project themselves?
Any project involving electrical wiring, gas lines, or structural changes should be handled by a licensed professional rather than attempted as a DIY project.