The single fastest way to lower your energy bill isn’t adjusting your thermostat, it’s fixing the parts of your home that are leaking energy every single day. According to the EPA, properly sealing and insulating a home can save homeowners up to 15 percent on heating and cooling costs alone, and when combined with other targeted upgrades, many households can realistically cut their total energy bills by 20 to 30 percent.
This guide ranks the most effective ways to reduce your home energy bills, from near-zero-cost fixes to bigger investments, based on real impact rather than marketing hype. We’ll also cover air sealing, insulation R-values, LED lighting, and practical buying advice for American homeowners wanting genuine, measurable savings.
By the end, you’ll know exactly where to start, what delivers the biggest return for your effort, and which upgrades are worth prioritizing over others.
Where Should You Actually Start?
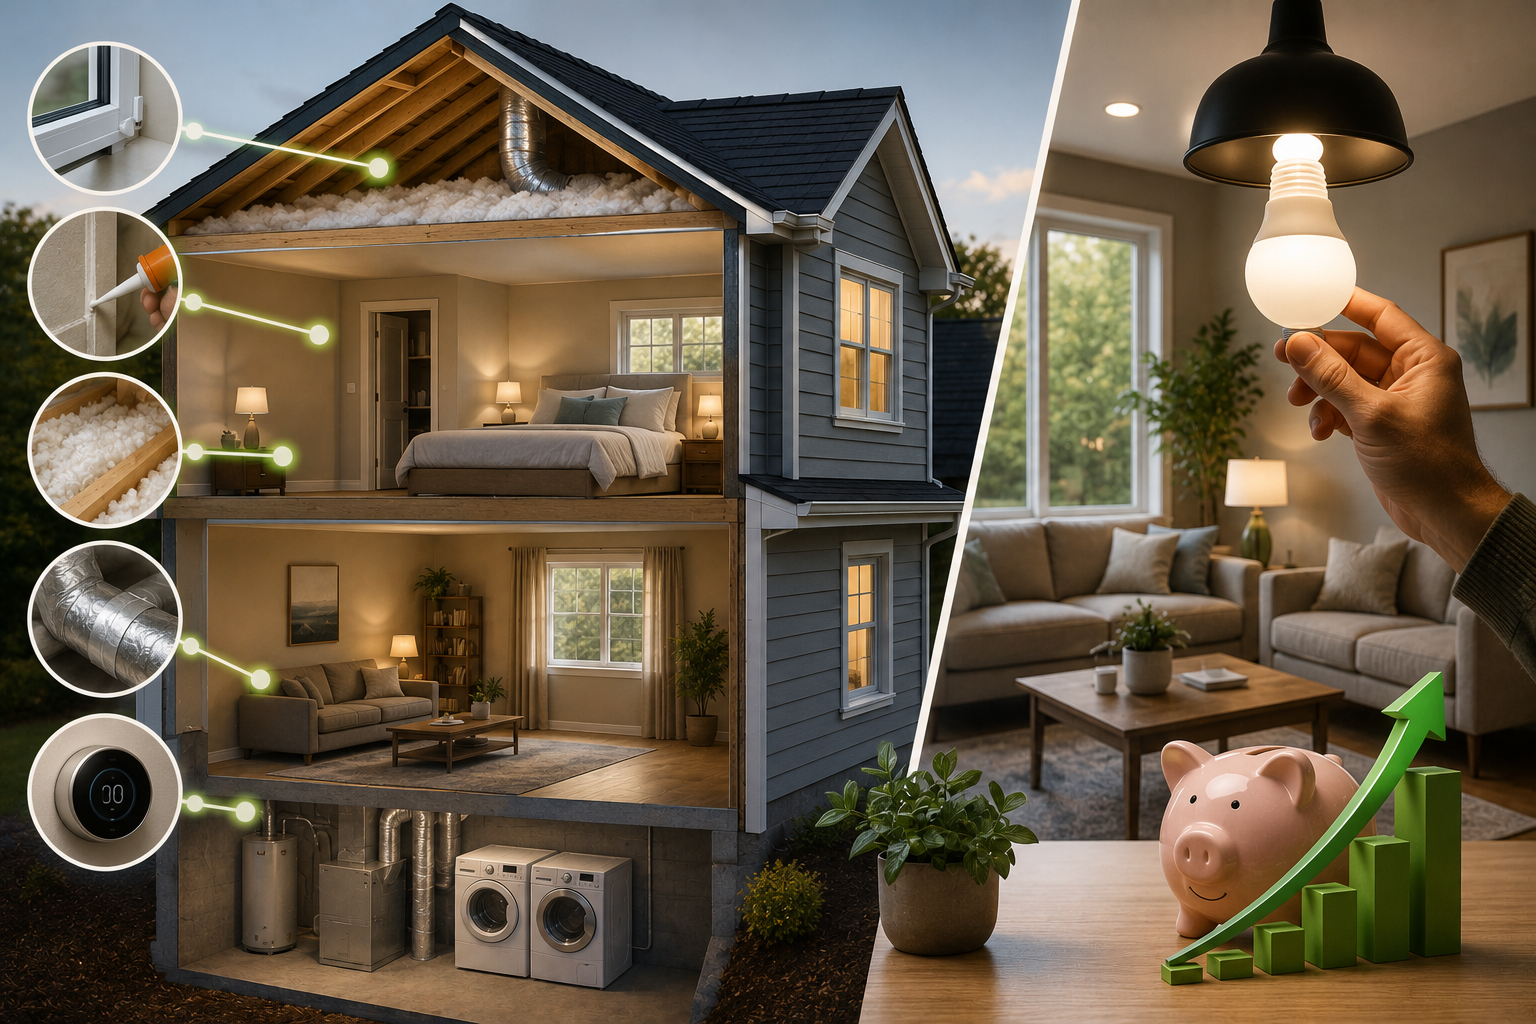
Start with air sealing and insulation, since the EPA estimates these two measures alone can reduce heating and cooling costs by up to 15 percent, with some sources citing a realistic range of 10 to 30 percent depending on your home’s current condition. From there, prioritize duct sealing, LED lighting, and thermostat management, all low-cost or no-cost fixes that deliver meaningful, immediate savings before considering bigger investments like appliance or HVAC replacement.
A useful rule of thumb worth following throughout this process: seal air leaks before replacing appliances, and replace the right appliances before tackling larger whole-home retrofits.
Fix One: Seal Air Leaks (The Highest-Value, Lowest-Cost Upgrade)
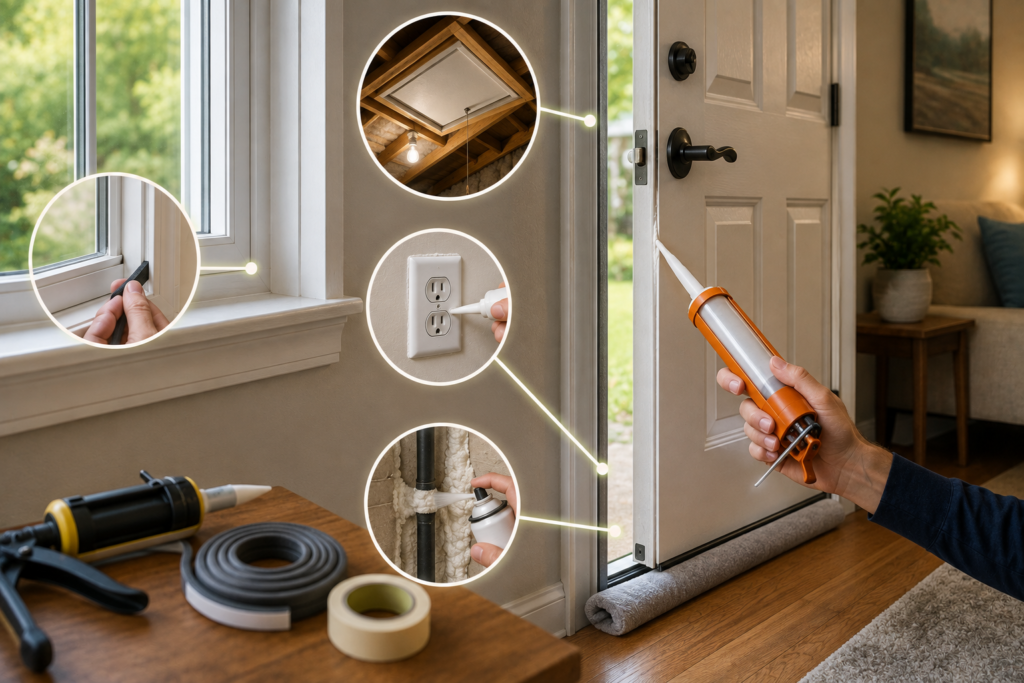
Air leaks around windows, doors, attics, and even electrical outlets let heated or cooled air escape constantly, forcing your HVAC system to work harder just to maintain a comfortable temperature. Sealing these leaks can reduce heating and cooling costs by 10 to 20 percent on its own, and when combined with adequate insulation, the two measures together often produce even greater combined savings.
Where to Look for Air Leaks
- Around windows and doors, where drafts are often immediately noticeable
- Attic access hatches and openings leading to unheated upper floors
- Gaps around electrical outlets, switches, and plumbing fixtures
- Rim joists and top plates, both common but easy-to-miss leak points
- Recessed lighting fixtures, which frequently create unexpected gaps into attic spaces
How to Seal Them
Weatherstripping and door sweeps address gaps around entry doors affordably, while caulk handles smaller gaps around window frames, outlets, and other fixed openings. For a genuinely no-cost temporary fix, something as simple as a rolled towel pressed against the bottom of a drafty door can noticeably reduce airflow until a permanent fix is in place.
Cost and payback: Air sealing and basic weatherization typically cost $200 to $800 and save $100 to $300 annually, often paying for itself within one to two years, a return that improves further when paired with available federal tax credits for qualifying insulation and air-sealing work.
Fix Two: Upgrade or Add Insulation
Insulation works alongside air sealing rather than replacing it, slowing the transfer of heat through your walls, attic, and floors so your HVAC system doesn’t have to compensate as constantly.
Proper attic insulation alone can reduce cooling costs by 20 to 40 percent during hot months, since attics can reach temperatures of 120 to 140°F in summer, pushing that heat directly into your living space without adequate insulation blocking it. Combined with air sealing, most homeowners can realistically reduce total heating and cooling costs by 10 to 30 percent through insulation upgrades.
Checking Your Current Insulation
A professional energy evaluation can measure your attic’s insulation depth and R-value, a measurement of how well the material resists heat flow, and compare it against recommended levels, generally in the R-38 to R-60 range for attics in most climates. If your levels fall below recommended standards, adding insulation delivers real value; if levels are already adequate, sealing remaining air leaks becomes the more impactful next step instead.
Fix Three: Seal and Insulate Your Ductwork
Ductwork running through unconditioned spaces like attics, basements, and crawl spaces is a commonly overlooked source of energy loss that many homeowners never think to check.
Leaky ducts can waste 20 to 30 percent of conditioned air before it ever reaches your living space, and sealing and insulating ducts properly can improve your heating and cooling system’s overall efficiency by 20 percent or more. For accessible duct joints, mastic sealant or metal-backed tape, never standard duct tape despite the name, effectively addresses this leakage.
Fix Four: Switch to LED Lighting
Lighting upgrades might seem minor compared with insulation, but research consistently ranks this as one of the highest-priority, lowest-cost actions available to homeowners.
A Penn State study identified switching from incandescent bulbs to LEDs as a higher-priority action than even replacing windows or installing solar panels, specifically because the payback on LED bulbs is immediate and the upfront cost is minimal. Since LED bulbs use significantly less energy than incandescent equivalents and last considerably longer, this remains one of the simplest, fastest fixes on this entire list.
Fix Five: Manage Your Thermostat Consistently
Thermostat behavior remains one of the most statistically significant, lowest-cost drivers of reduced household energy use, according to the same Penn State research.
Reducing your thermostat’s set point during winter, and consistently applying setbacks when you’re asleep or away, can meaningfully cut energy consumption without any equipment purchase at all. A programmable or smart thermostat can save $100 to $200 annually by automating these adjustments consistently, removing the reliance on remembering to manually adjust the temperature every time you leave or go to bed.
Fix Six: Optimize Water Heating
Water heating represents a genuine, often overlooked share of most home energy bills, and a few targeted fixes can meaningfully reduce this cost.
Installing low-flow showerheads and faucet aerators reduces the amount of hot water your system needs to heat in the first place, directly lowering water heating energy use. Washing clothes in cold water whenever possible, avoiding over-drying, and cleaning the dryer’s lint trap before every load all improve laundry-related energy efficiency without requiring any new equipment purchase.
Fix Seven: Choose ENERGY STAR Appliances When Replacing
When it’s genuinely time to replace an aging appliance, choosing an ENERGY STAR certified model ensures you’re getting verified efficiency rather than relying on marketing claims alone.
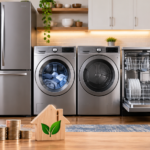
This applies across major home appliances, refrigerators, dishwashers, washing machines, and HVAC equipment alike, since ENERGY STAR certification requires meeting specific, independently verified efficiency standards. Modern heat pumps in particular offer 200 to 400 percent efficiency compared with the 80 to 95 percent efficiency range typical of traditional furnaces, making this upgrade worth strong consideration if your existing heating system is aging or was already due for replacement regardless of energy savings.
Comparing Energy-Saving Fixes by Cost and Impact
| Fix | Typical Cost | Potential Savings | Payback Timeline |
| Air sealing | $200–$800 | 10–20% on heating/cooling | 1–2 years |
| Attic insulation upgrade | Varies by home | 20–40% cooling, 10–30% combined | Varies, often 2–5 years |
| Duct sealing | Low–moderate, often DIY | Up to 20%+ HVAC efficiency | Fast, often under 2 years |
| LED bulb replacement | Very low | Immediate on lighting costs | Near-immediate |
| Smart/programmable thermostat | $70–$250 | $100–$200/year | 1–2 years |
| Low-flow fixtures/aerators | Very low | Reduces water heating costs | Near-immediate |
| ENERGY STAR appliance upgrade | Higher upfront | Varies by appliance type | Longer, but ongoing |
Renter-Friendly Ways to Cut Energy Costs
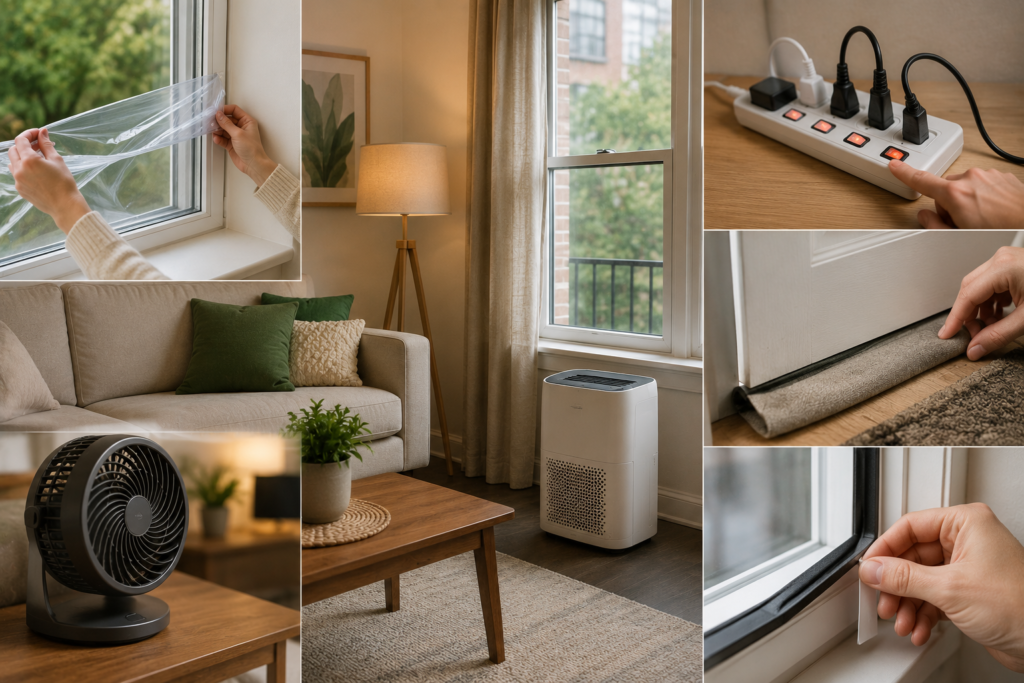
Not every energy-saving fix requires ownership or permanent home modifications, and renters can still achieve meaningful reductions through non-permanent strategies.
Renters can realistically achieve 15 to 25 percent energy savings through behavioral changes, removable improvements, and appliance optimization alone. Effective renter-friendly strategies include LED bulb swaps, keeping the original bulbs to reinstall later, removable weatherstripping, thermal curtains to reduce drafts, smart power strips to manage standby power draw, and simply optimizing settings on appliances already in the unit. Many renters following these approaches save $200 to $500 annually without making any permanent changes to the property.
Understanding Tax Credits and Rebates
Federal and local incentives can meaningfully improve the financial return on several of these upgrades, worth checking before you assume a project is out of budget.
Insulation and air-sealing work meeting current energy code standards may qualify for federal tax credits, and it’s worth confirming eligibility through the Department of Energy before purchasing materials specifically to claim this benefit. Broader federal incentives can also apply to solar panels, heat pump installations, and other qualifying efficiency upgrades, often reducing effective payback periods by several years when combined with the energy savings themselves. Checking your specific utility provider’s rebate programs, alongside databases tracking state and local incentives, is worth doing before committing to any larger energy efficiency investment.
Building Your Own Priority List
Rather than trying to tackle everything at once, working through fixes in order of cost-effectiveness produces the best return for your time and money.
- Start with no-cost and low-cost fixes: LED bulb swaps, basic weatherstripping, and consistent thermostat management deliver immediate value without requiring any major purchase.
- Move to air sealing and duct sealing next: These deliver some of the highest percentage savings relative to their moderate cost, typically paying for themselves within one to two years.
- Address insulation gaps identified through an energy evaluation: If a professional assessment reveals insulation levels below recommended standards, this becomes a worthwhile next investment.
- Save appliance and HVAC replacement for when equipment genuinely needs it: Rather than replacing functional equipment purely for efficiency gains, prioritize ENERGY STAR models specifically when existing equipment is already nearing the end of its natural lifespan.
Common Mistakes That Undermine Energy-Saving Efforts
- Replacing appliances before sealing air leaks: A new, efficient furnace still has to work harder than necessary if warm air is constantly escaping through unsealed gaps throughout the home.
- Assuming insulation alone solves the problem: Air leakage is often the bigger contributor to energy loss than heat conduction through walls, meaning sealing and insulation genuinely need to work together for the best results.
- Ignoring furnace and HVAC maintenance: Servicing your furnace annually and checking air filters monthly keeps existing equipment running at its intended efficiency, an easy fix that’s frequently overlooked.
- Overlooking renter-friendly options entirely: Assuming energy savings require homeownership causes many renters to miss out on genuinely effective, fully reversible improvements.
- Not checking for available rebates and tax credits: Skipping this step means potentially leaving hundreds of dollars in available incentives unclaimed on qualifying upgrades.
Seal First, Then Build From There
Reducing your home energy bills effectively comes down to prioritizing fixes by genuine cost-effectiveness rather than chasing the flashiest upgrade first. Air sealing and insulation deliver the EPA-verified biggest combined impact for the investment, followed by duct sealing, LED lighting, and consistent thermostat management, all before considering bigger appliance or HVAC replacements. Whether you own or rent, working through this priority list systematically, starting with the lowest-cost, highest-impact fixes, gives you genuine, measurable savings without wasting money on upgrades that don’t match your home’s actual needs.
Frequently Asked Questions
1- What’s the single most cost-effective energy-saving fix?
Air sealing and basic weatherization typically offer the best return on investment, costing $200 to $800 while saving $100 to $300 annually, often paying for itself within one to two years.
2- How much can proper insulation actually save on my energy bill?
The EPA estimates up to 15 percent in combined heating and cooling savings from sealing and insulation together, with some sources citing a broader realistic range of 10 to 30 percent depending on your home’s starting condition.
3- Do LED bulbs really make a meaningful difference?
Yes, research has specifically identified LED lighting upgrades as a higher-priority action than even window replacement or solar installation, due to the immediate payback and minimal upfront cost involved.
4- Can renters actually reduce their energy bills without owning their home?
Yes, renters can realistically achieve 15 to 25 percent savings through non-permanent strategies like LED swaps, removable weatherstripping, thermal curtains, and smart power strips.
5- Should I seal air leaks or upgrade insulation first?
Address air sealing first where possible, since air leakage is often the larger contributor to energy loss, and combining it with adequate insulation produces the strongest overall results.
6- Are there tax credits available for energy efficiency upgrades?
Yes, insulation and air-sealing work meeting current energy code standards may qualify for federal tax credits, and it’s worth confirming specific eligibility through the Department of Energy before purchasing materials.